Homemade Probiotic: DIY Sauerkraut
Create your own homemade sauerkraut with this easy, step-by-step recipe. Packed with probiotics and natural goodness, this tangy, crunchy fermented dish is a healthy addition to any meal. Let's get fermenting!
Equipment
- 1 tamper Or other makeshift solution
- 4 fermentation weights Or clean rocks
- 4 500ml canning jars
- 4 cheesecloth or muslin covers
- 4 elastics
- 1 large chopping board
- 1 large sharp knife
- 1 food processor Optional
- 1 large pot
- 1 large bowl
- 1 tong
Ingredients
- 1.8 Kg green or purple cabbage Preferably organic
- 1 tbsp quality salt (fine texture) Himalayan pink salt, sea salt or Oryx Desert Salt
- filter water If needed
Instructions
- Sterilise your jars, lids and weights in boiling water for 10 minutes. Remove with your tongs and allow to drip and cool upside down.
- 1.8 Kg green or purple cabbage Remove the outer leaves, as they may be damaged or dirty. Aim to have at least 1.7–1.8 kg of cabbage to work with after trimming.
- Save two large, clean leaves to use later for covering the shredded cabbage during fermentation. This will act as a natural "lid" to keep the kraut submerged under its brine.
- Remove the core from the cabbage and discard it. Cut the cabbage into quarters to make it easier to handle.
- Shred the cabbage by hand or with a food processor.
- Transfer to your large bowl.
- Allow the cabbage to sit for 10–15 minutes. This rest time makes the next step easier.
- Evenly sprinkle the salt over the shredded cabbage.
- Use clean hands to gently toss the cabbage, ensuring the salt coats every piece. Then, massage the cabbage for about 10 minutes. As you massage, the cabbage will wilt and reduce in volume, releasing liquid to form a salty brine.
- Scoop the wilted cabbage into the four sterilised jars, dividing it equally.
- Use your tamper (or alternative tool) to firmly pack down the cabbage in each jar. Compressing removes air pockets and ensures the cabbage is fully submerged in brine.
- Divide the brine equally between the jars, ensuring the cabbage is completely covered by liquid. If necessary, press the cabbage again to release more brine or add a small amount of filtered water to top it up.
- Take the large cabbage leaves you set aside earlier and cut them into 4 circles, each approximately the size of the lip of your jar.
- Gently press each cabbage circle into the top of the shredded cabbage in each jar. This will help keep the cabbage submerged under the brine during fermentation.
- Place the fermentation weights (or your chosen alternative, like a clean rock) on top of the cabbage leaves in each jar. The weights should fit snugly inside the jar and keep the cabbage submerged under the brine. This is essential to prevent exposure to air and mold growth.
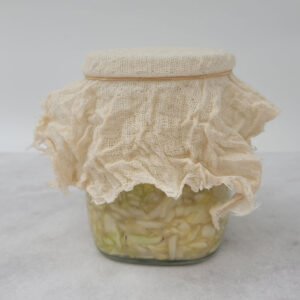
- If you're using cheesecloth or muslin, cover each jar with the fabric and secure it with an elastic band. This allows the gases produced during fermentation to escape while keeping out dust and debris. (Alternative: If you have fermentation lids with a release valve, you can use them to cover the jars instead).
- Ensure that the brine completely covers the cabbage. If the brine level has dropped, top up with a small amount of filtered water to keep the cabbage submerged.
- With everything packed down and covered, your sauerkraut is ready for fermentation!
- Place the jars in a cool, dark spot at room temperature, away from direct sunlight. A kitchen cupboard or pantry is ideal. The fermentation process will begin, and the cabbage will start to develop its tangy flavour.
- Let the sauerkraut ferment for 1 to 2 weeks. Check it daily to ensure the cabbage stays submerged in the brine. If needed, press it down with the tamper or add more brine (saltwater solution) to keep it covered.
- After a week, start tasting the sauerkraut daily. Once it reaches your desired level of sourness, it’s ready to be moved to the fridge.
- When fermentation is complete, transfer sauerkraut to clean jars, seal them with their lids and transfer them to the fridge. The cold will slow down the fermentation process and preserve the sauerkraut. It will continue to improve in flavour as it sits. (You can use the same canning jar if you prefer).
- Your homemade sauerkraut is now ready to enjoy! It can last in the fridge for several months, so be sure to make plenty to enjoy over time.