
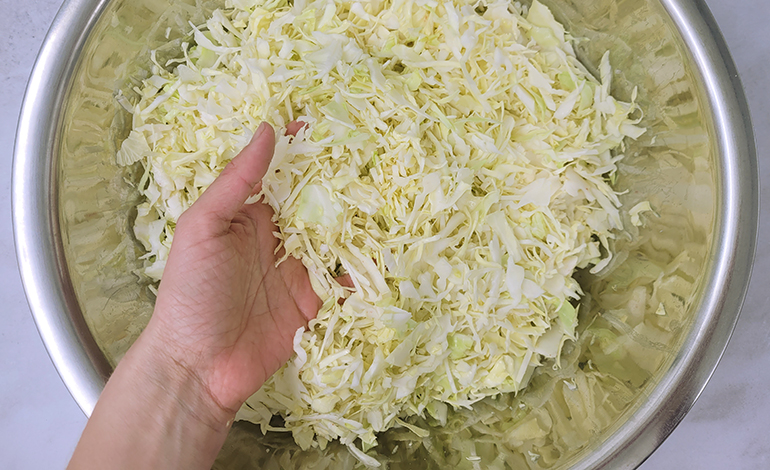

Sauerkraut, a fermented cabbage dish, has a rich history that spans centuries and cultures. Renowned for its tangy flavour and exceptional health benefits, it remains a beloved staple in many parts of the world. This blog explores the cultural roots, gut-healing properties, and practical tips to incorporate sauerkraut into your diet, along with why it’s worth making your own at home.
Cultural Roots of Sauerkraut
Sauerkraut’s origins trace back over 2,000 years to ancient China, where fermented cabbage was preserved for the winter months. It gained popularity in Europe during the Middle Ages, particularly in Germany, Poland, and Russia, where it became a dietary staple. German immigrants brought sauerkraut to the Americas, cementing its place as a cherished side dish in various cuisines. In Korea, its cousin, kimchi, similarly showcases the universal appeal of fermented cabbage. Across these cultures, sauerkraut is celebrated not only for its flavour but also for its ability to preserve essential nutrients.
The Tremendous Health Benefits of Sauerkraut
Sauerkraut is not just a powerhouse of probiotics; it’s also rich in antioxidants, vitamins, and minerals that contribute to its amazing health benefits. It’s an excellent source of vitamin C, which supports immune function and protects cells from oxidative stress. Vitamin K plays a vital role in bone health and blood clotting, while the high fibre content aids digestion and supports a healthy gut lining. Sauerkraut also contains manganese, iron, and calcium, essential for energy production, oxygen transport, and bone strength.
Interestingly, sauerkraut is a natural source of L-glutamine, an amino acid that plays a key role in gut health. L-glutamine supports the repair of the intestinal lining, making it particularly beneficial for those with conditions like leaky gut syndrome, inflammatory bowel disease, or general gut inflammation. By combining probiotics with these nutrients, sauerkraut offers a multifaceted approach to gut healing and overall wellness.
1. Gut Health
Sauerkraut is a live ferment, meaning it contains natural probiotics that support the gut microbiome. These beneficial bacteria aid digestion, improve nutrient absorption, and strengthen the immune system. A healthy gut can reduce bloating, constipation, and even mood disorders like anxiety and depression, thanks to the gut-brain connection.
2. Nutrient Boost
Rich in vitamin C, vitamin K, and fibre, sauerkraut also provides antioxidants that combat oxidative stress. The fermentation process increases the bioavailability of these nutrients, making them easier for your body to absorb.
3. Immune Support
The probiotics in sauerkraut strengthen the intestinal lining and prevent harmful pathogens from taking hold. This enhances your overall immunity, reducing susceptibility to illnesses.
4. Anti-Inflammatory Properties
Regular consumption of sauerkraut can help lower inflammation, a key factor in chronic diseases like arthritis, diabetes, and heart disease.
Live Ferments vs. Commercial Pasteurised Sauerkraut
Not all sauerkraut is created equal. Traditional sauerkraut is a live ferment, teeming with probiotics. In contrast, most commercial versions are pasteurised, killing the beneficial bacteria through heat treatment. While pasteurised sauerkraut may retain some vitamins, it lacks the gut-healing properties of a live ferment. For maximum benefits, look for refrigerated sauerkraut labelled “raw” or “unpasteurised.”
The Taste and How to Enjoy Sauerkraut
Sauerkraut’s tangy, slightly sour flavour may take some getting used to, but it’s worth the effort. Start small by adding a tablespoon to salads, sandwiches, or bowls. Its acidity pairs well with rich, savoury dishes, making it a versatile condiment. Over time, your taste buds will adapt, and you’ll likely crave its refreshing zing.
Daily Consumption for Maximum Benefit
For optimal health benefits, aim for 1–2 tablespoons of raw sauerkraut daily to start. If your gut is sensitive or you’re new to fermented foods, start with smaller amounts and gradually increase to avoid bloating or discomfort. Ideally work up to enjoying 1 tablespoon per meal everyday – your gut will love you for it!
Why Food-Based Fermented Probiotics Outshine Supplements
While probiotic supplements have their place, food-based probiotics like sauerkraut offer a natural, synergistic combination of nutrients and live bacteria. These probiotics are more bioavailable and come with additional vitamins, minerals, and fibre not found in capsules. Moreover, eating fermented foods promotes a connection to traditional eating habits, fostering a more sustainable and enjoyable approach to gut health.
Affordability and Ease of Making Sauerkraut
One of sauerkraut’s greatest appeals is its simplicity and affordability. With just cabbage, salt, and a little patience, you can create a nutrient-dense superfood in your own kitchen. Homemade sauerkraut is not only cost-effective but also ensures you’re consuming a raw, live ferment free of preservatives and additives.
The Benefits of Homemade Nutrient-Dense Foods
Making nutrient-dense foods like sauerkraut at home offers unparalleled benefits. You have complete control over the ingredients, ensuring you use the highest-quality produce and avoiding harmful additives or preservatives often found in store-bought versions. First prize is to use organically grown cabbage, free of pesticides and full of natural nutrients. Pair this with a quality salt like Oryx Desert Salt or genuine Himalayan salt, which not only enhances the flavour but also adds trace minerals vital for health. Homemade foods allow you to nourish your body while staying connected to the process of creating wholesome meals, fostering a deeper appreciation for what you eat. Plus, the satisfaction of making something from scratch is a reward in itself!
By incorporating sauerkraut into your daily routine, you’re honouring the wisdom of centuries of tradition while reaping amazing health benefits. Give your gut the love it deserves – one tangy bite at a time!
How to Make Sauerkraut from Scratch
In this section, I’ll walk you through how to make your own sauerkraut at home. We’ll cover the ingredients, equipment, and step-by-step instructions needed to create 2 litres of tangy, nutrient-packed sauerkraut (enough to fill four 500ml jars). To make the process simple, I’ve included clear directions alongside helpful images to guide you at every stage. Let’s get started!
Select and Clean the Cabbage
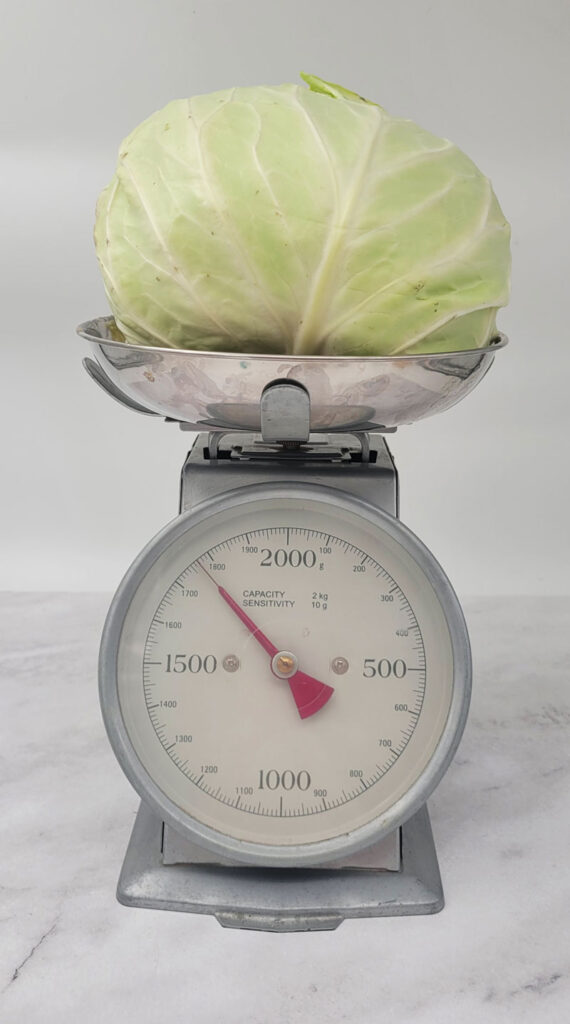
Start by choosing a fresh, firm cabbage weighing around 1.8 kg. Remove the outer leaves, as they may be damaged or dirty. Aim to have at least 1.7–1.8 kg of cabbage to work with after trimming. (Organically grown is best to ensure it’s free of pesticides and full of nutrients).
Set Aside a Leaf for the Top
Save two large, clean leaves to use later for covering the shredded cabbage during fermentation. This will act as a natural “lid” to keep the kraut submerged under its brine.
Salt: Use 2% of the cabbage weight in salt. For 1.8 kg of cabbage, you’ll need about 36g / 1 Tablespoon of high-quality salt, such as fine Himalayan pink salt, sea salt or Oryx Desert Salt. Avoid cheap table salt with additives like iodine or anti-caking agents (aluminum), as these can interfere with the fermentation process.
Equipment: Before starting your sauerkraut-making adventure, ensure you have the following equipment ready. Some items are specialty tools, but you can get creative with alternatives. Preparation is key to making your first fermentation project a success!
Tamper
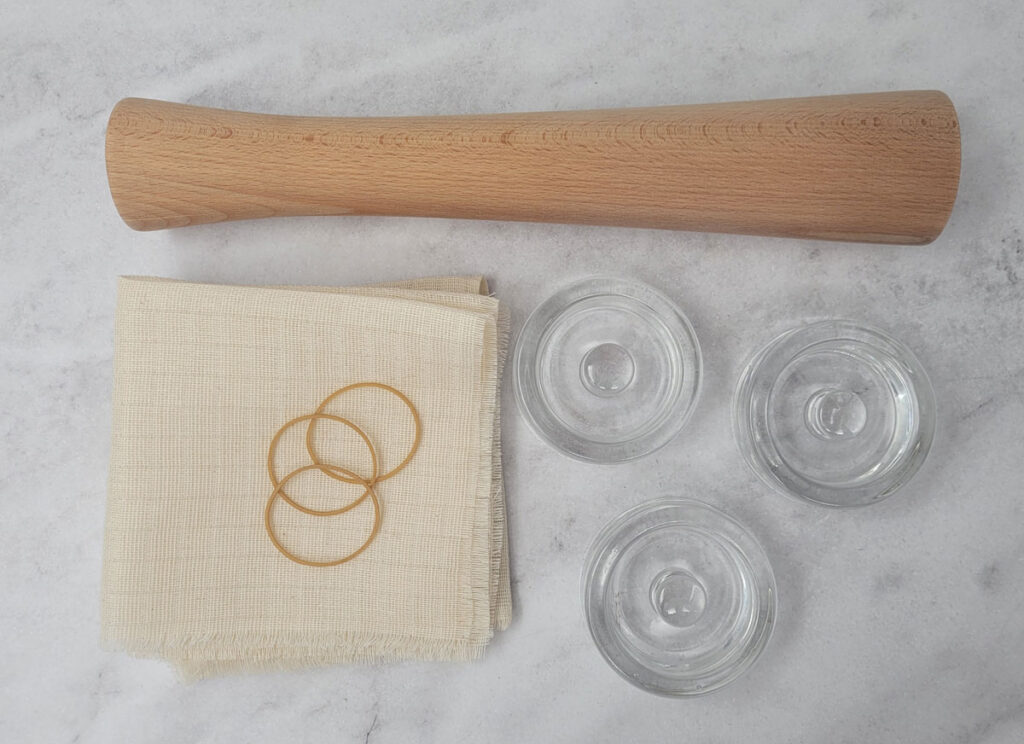
Recommended: A wooden sauerkraut tamper (shown in the image) is perfect for compressing the cabbage into the jars.
Alternatives: Use a tamper from your blender, a wooden spoon, or any kitchen utensil that fits inside your jar and can compact the cabbage effectively.
Weights
Recommended: Glass fermentation weights, available online, are designed to keep the cabbage submerged under the brine.
Alternatives: A clean, heavy rock that fits inside the jar will also work. Weighing the cabbage down is essential to prevent any exposed pieces from moulding.
Canning Jars
Recommended: 500ml glass jars, such as Consol jars in South Africa or Mason jars in the US. These work perfectly with glass fermentation lids if you have them.
Alternatives: Any clean glass jar, 500ml or larger, that fits your chosen weights and allows for secure sealing or covering.
Cheesecloth or Muslin Covers
Purpose: Natural, breathable fabric to cover the jar, allowing gas to escape during fermentation.
Optional Upgrade: Fermentation lids with release valves are a convenient alternative.
Elastics
Use elastic bands to secure the fabric over the jar opening.
Chopping Board and Knife
A large chopping board and a sharp knife for slicing the cabbage.
Food Processor (Optional)
Speeds up the cabbage shredding process. If unavailable, finely chop the cabbage by hand with your knife.
A Large Pot
Used to sterilise jars before use, ensuring your sauerkraut remains safe from unwanted bacteria.
A Large Bowl
Purpose: A very big bowl is essential for massaging the cabbage. This step helps to break down the fibres, release moisture, and create the brine necessary for fermentation. Make sure the bowl is large enough to hold all 1.7–1.8 kg of shredded cabbage comfortably.
Tongs
Purpose: To safely remove the hot jars, lids, and weights from the boiling water after sterilisation. Ensure the tongs are clean and sturdy for easy handling.
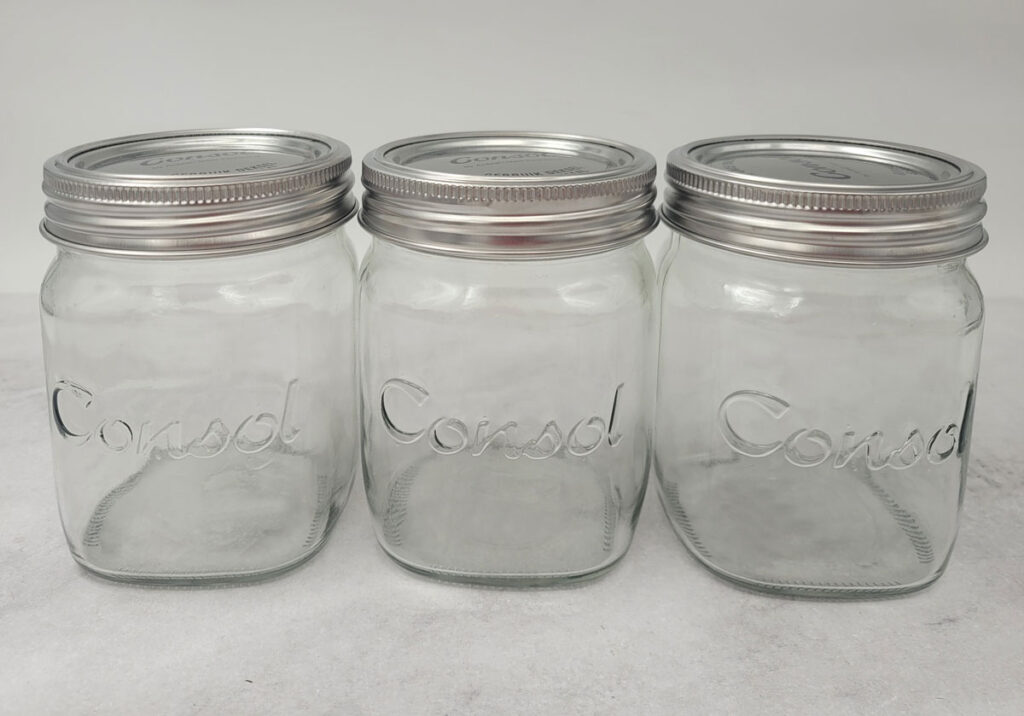
Step 1: Sterilise Your Equipment
- Prepare Your Equipment
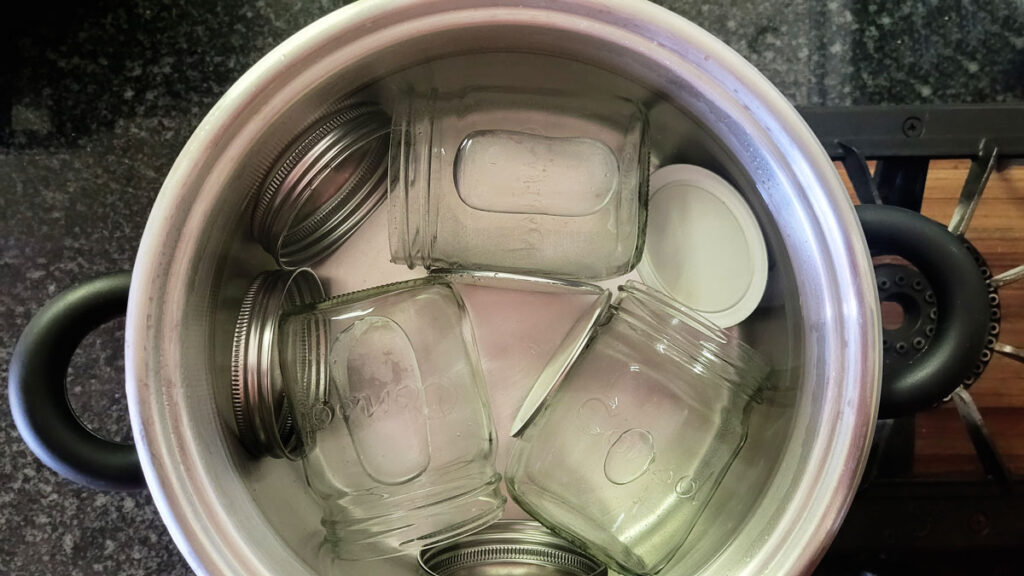
Gather your jars, lids, and fermentation weights (or chosen alternatives) and place them in a large pot. - Boil to Sterilise
Fill the pot with water, ensuring the equipment is fully submerged. Bring the water to a rolling boil and let everything sterilise for 10 minutes. - Remove and Dry
Use tongs to carefully remove the jars, lids, and weights from the boiling water. Place them upside down on a clean towel or drying rack and allow them to air dry and cool completely.
Once everything is sterilised and ready, you can move on to preparing the cabbage.
Step 2: Shred Your Cabbage
Prepare the Cabbage
Remove the core from the cabbage and discard it. Cut the cabbage into quarters to make it easier to handle.
Shred the Cabbage
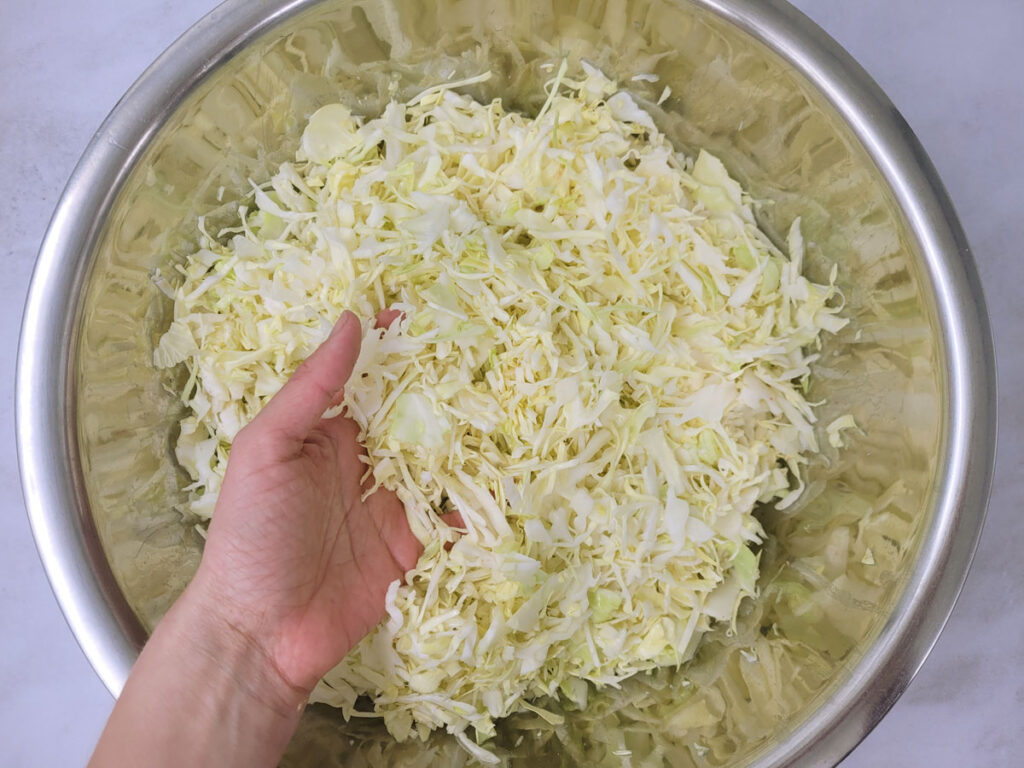
By Hand: Use a sharp knife to finely slice the cabbage into thin strips, aiming for your desired texture.
With a Food Processor: Use the shredding blade to process the cabbage quickly and evenly. Adjust to your preferred thickness by using the appropriate setting or blade.
Transfer to a Bowl
Place all the shredded cabbage into a very large bowl to prepare for the next step.
Step 3: Salt the Cabbage
Let It Rest
Allow the cabbage to sit for 10–15 minutes. This rest time makes the next step easier.
Measure the Salt
Weigh the shredded cabbage to confirm you have approximately 1.7–1.8 kg. Measure 2% of the cabbage weight in salt (around 34–36g / 1 Tablespoon for this volume).
Sprinkle the Salt
Evenly sprinkle the salt over the shredded cabbage in the large bowl.
Massage
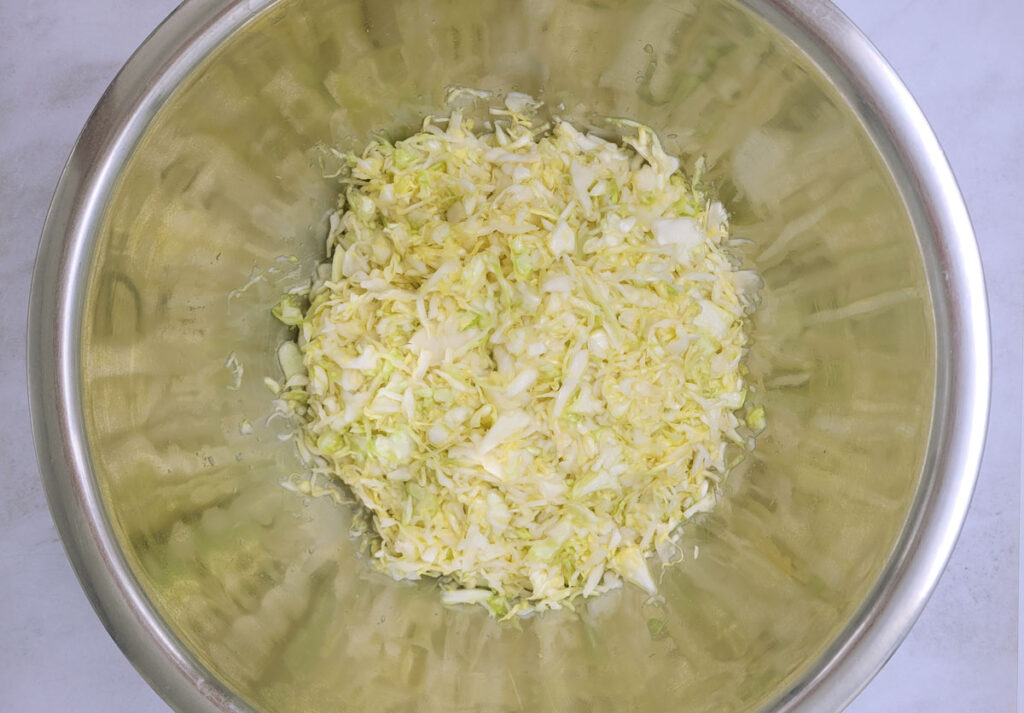
Use clean hands to gently toss the cabbage, ensuring the salt coats every piece. Then, massage the cabbage for about 10 minutes. As you massage, the cabbage will wilt and reduce in volume, releasing liquid to form a salty brine.
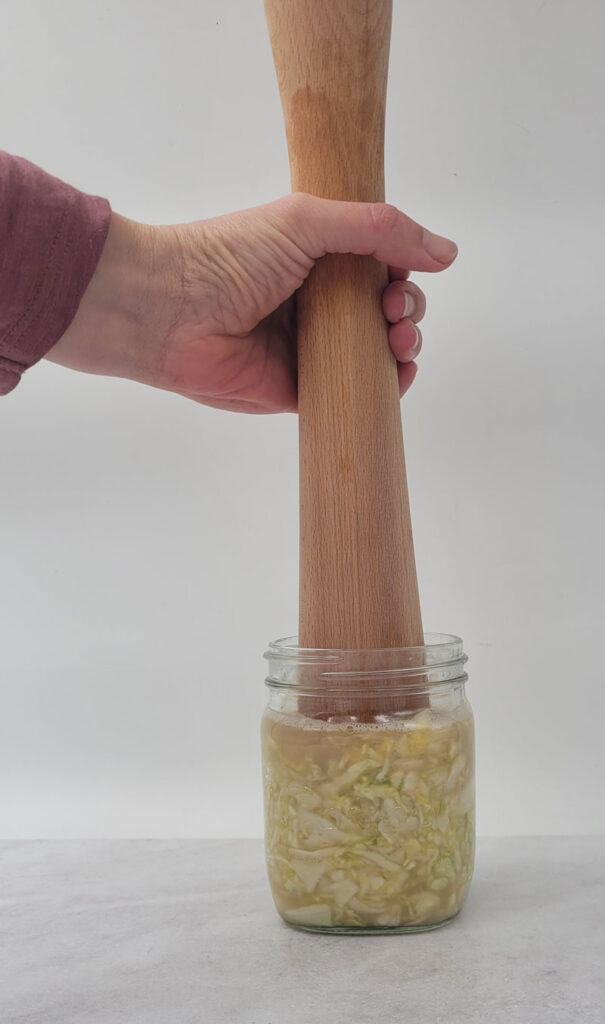
Step 4: Pack the Cabbage into Jars
Divide the Cabbage
Scoop the wilted cabbage into the four sterilised jars, dividing it equally.
Compress the Cabbage
Use your tamper (or alternative tool) to firmly pack down the cabbage in each jar. Compressing removes air pockets and ensures the cabbage is fully submerged in brine.
Add the Brine
Divide the brine equally between the jars, ensuring the cabbage is completely covered by liquid. If necessary, press the cabbage again to release more brine or add a small amount of filtered water to top it up.
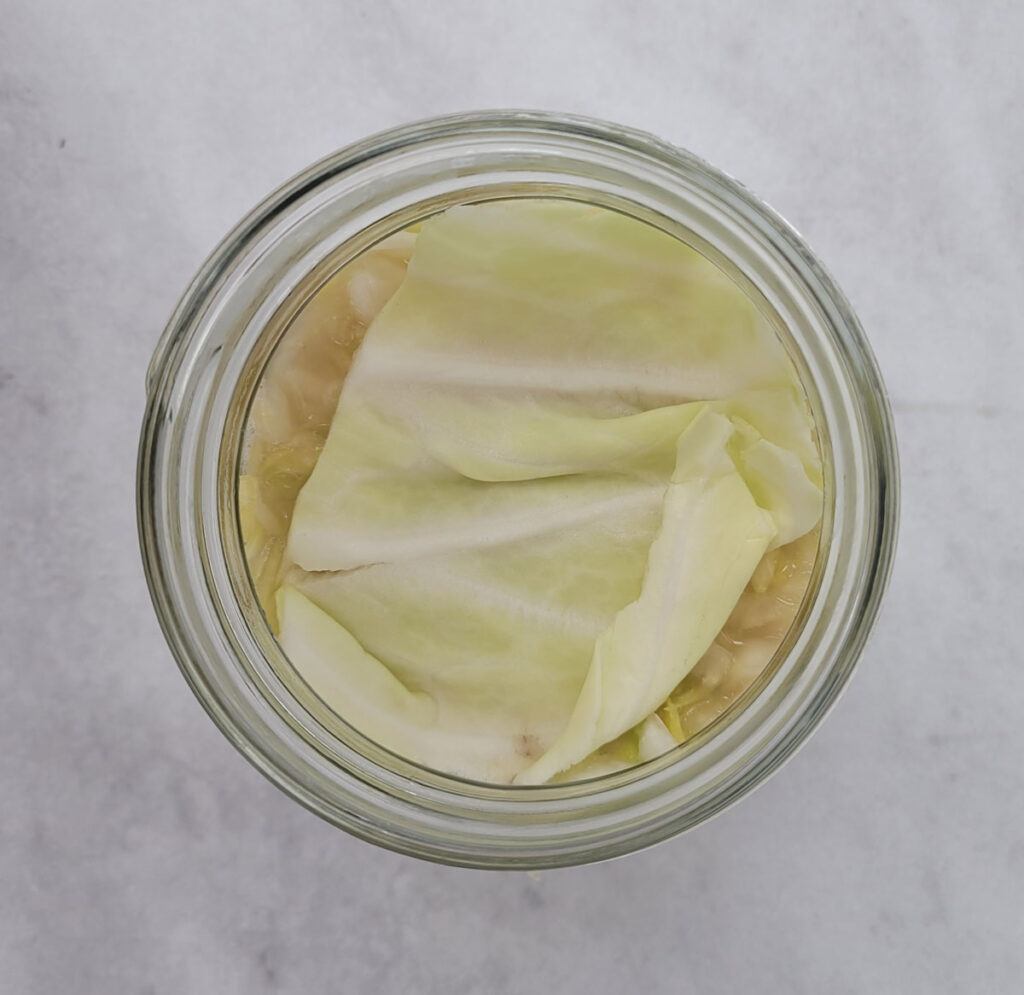
Step 5: Add the Cabbage Leaves
- Prepare the Leaves
Take the large cabbage leaves you set aside earlier and cut them into 4 circles, each approximately the size of the lip of your jar. - Press the Leaves into the Jars
Gently press each cabbage circle into the top of the shredded cabbage in each jar. This will help keep the cabbage submerged under the brine during fermentation.
The leaves act as a natural barrier to prevent the shredded cabbage from floating above the brine and potentially molding.
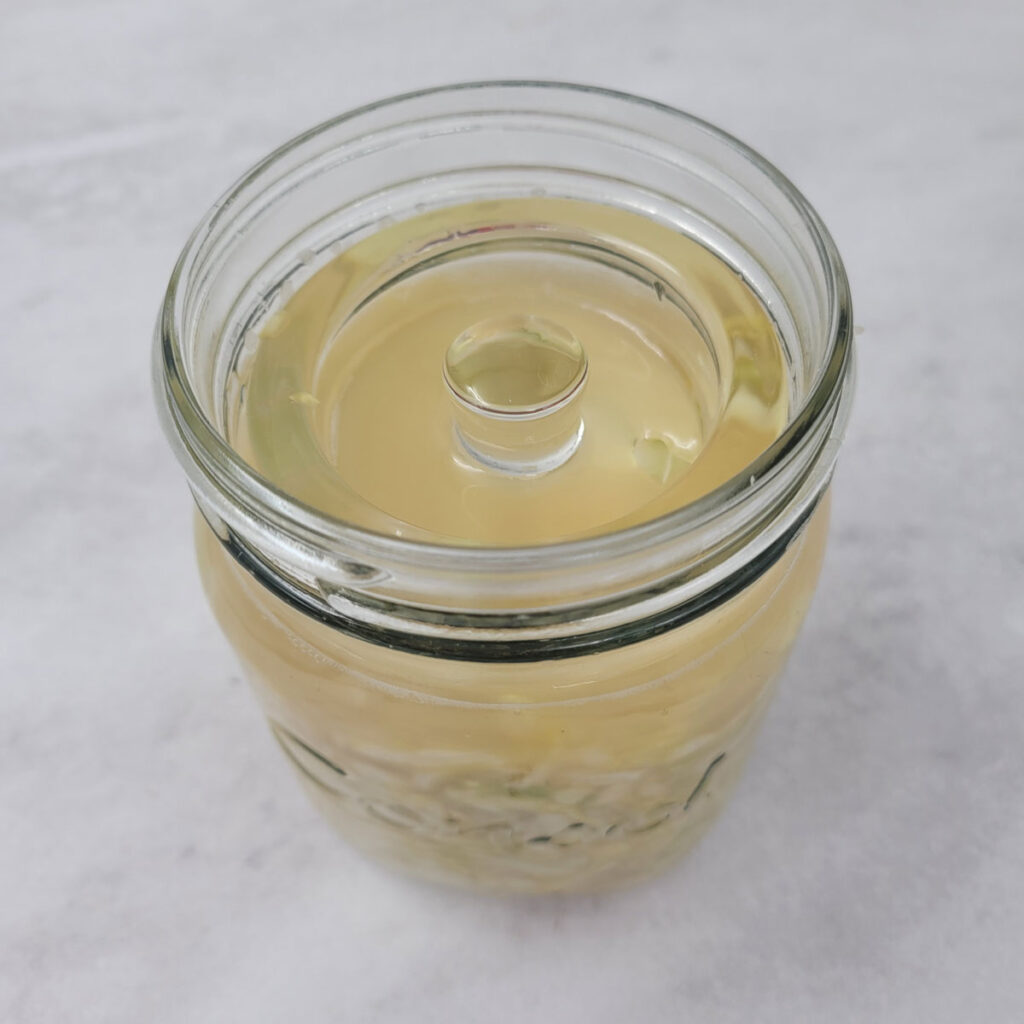
Step 6: Add Weights and Secure the Jars
- Add the Weights
Place the fermentation weights (or your chosen alternative, like a clean rock) on top of the cabbage leaves in each jar. The weights should fit snugly inside the jar and keep the cabbage submerged under the brine. This is essential to prevent exposure to air and mold growth. - Cover the Jars
If you’re using cheesecloth or muslin, cover each jar with the fabric and secure it with an elastic band. This allows the gases produced during fermentation to escape while keeping out dust and debris.- Alternative: If you have fermentation lids with a release valve, you can use them to cover the jars instead.
- Check the Brine Level
Ensure that the brine completely covers the cabbage. If the brine level has dropped, top up with a small amount of filtered water to keep the cabbage submerged.
With everything packed down and covered, your sauerkraut is ready for fermentation!
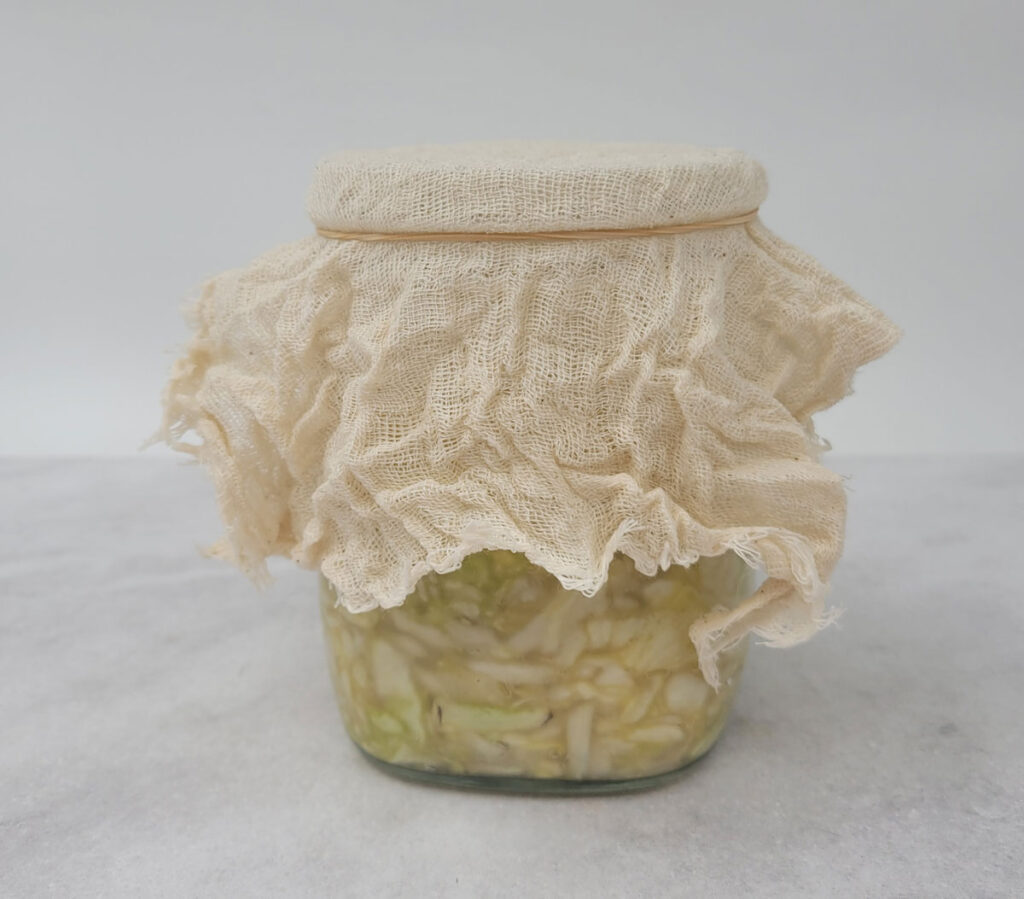
Step 7: Fermentation and Storage
- Ferment at Room Temperature
Place the jars in a cool, dark spot at room temperature, away from direct sunlight. A kitchen cupboard or pantry is ideal. The fermentation process will begin, and the cabbage will start to develop its tangy flavour. - Fermentation Time
Let the sauerkraut ferment for 1 to 2 weeks. Check it daily to ensure the cabbage stays submerged in the brine. If needed, press it down with the tamper or add more brine (saltwater solution) to keep it covered. - Taste Test
After a week, start tasting the sauerkraut daily. Once it reaches your desired level of sourness, it’s ready to be moved to the fridge. - Refrigeration
When fermentation is complete, transfer sauerkraut to clean jars, seal them with their lids and transfer them to the fridge. The cold will slow down the fermentation process and preserve the sauerkraut. It will continue to improve in flavour as it sits. (You can use the same canning jar if you prefer).
Your homemade sauerkraut is now ready to enjoy! It can last in the fridge for several months, so be sure to make plenty to enjoy over time.
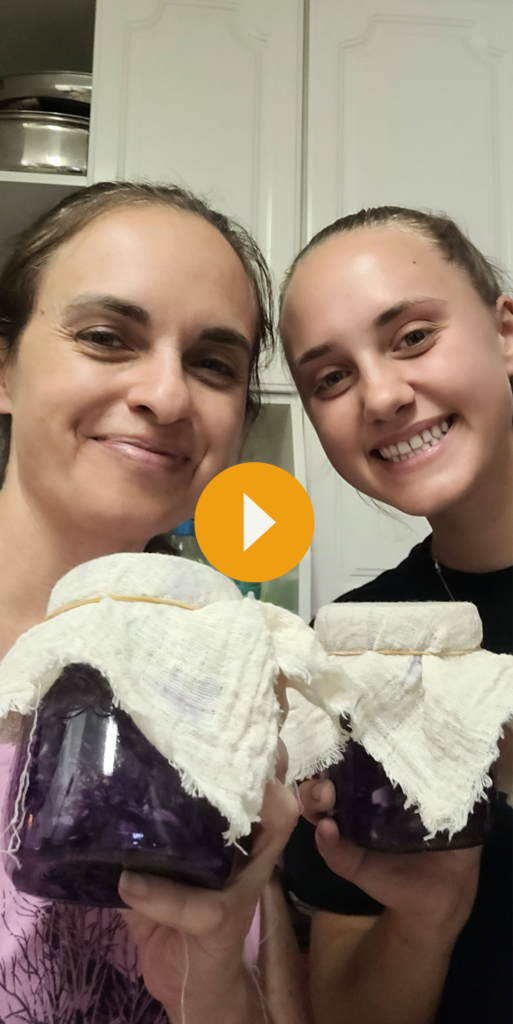
“Turning purple! 🌿💜 Watch me and my friend Madi make vibrant, nutrient-packed purple sauerkraut – because who says sauerkraut can’t be both beautiful and good for you? #FermentationFun #PurplePower #HealthyGut”
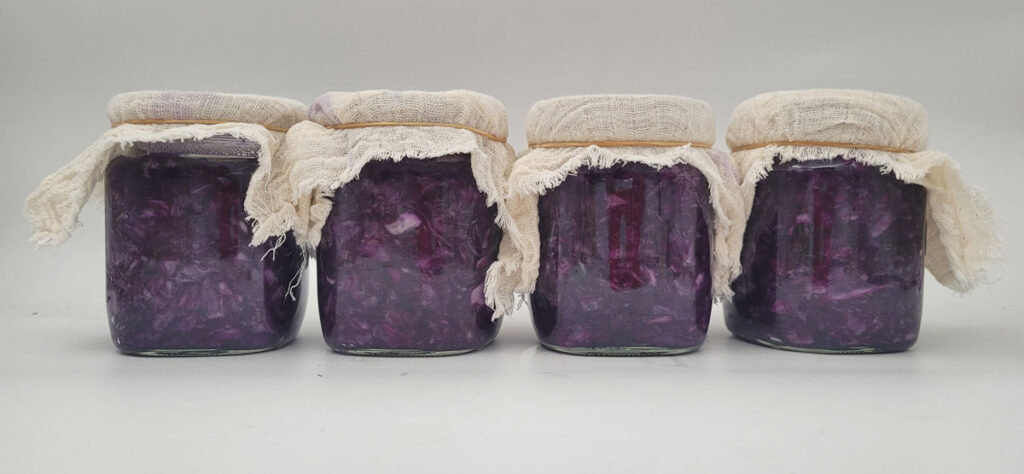
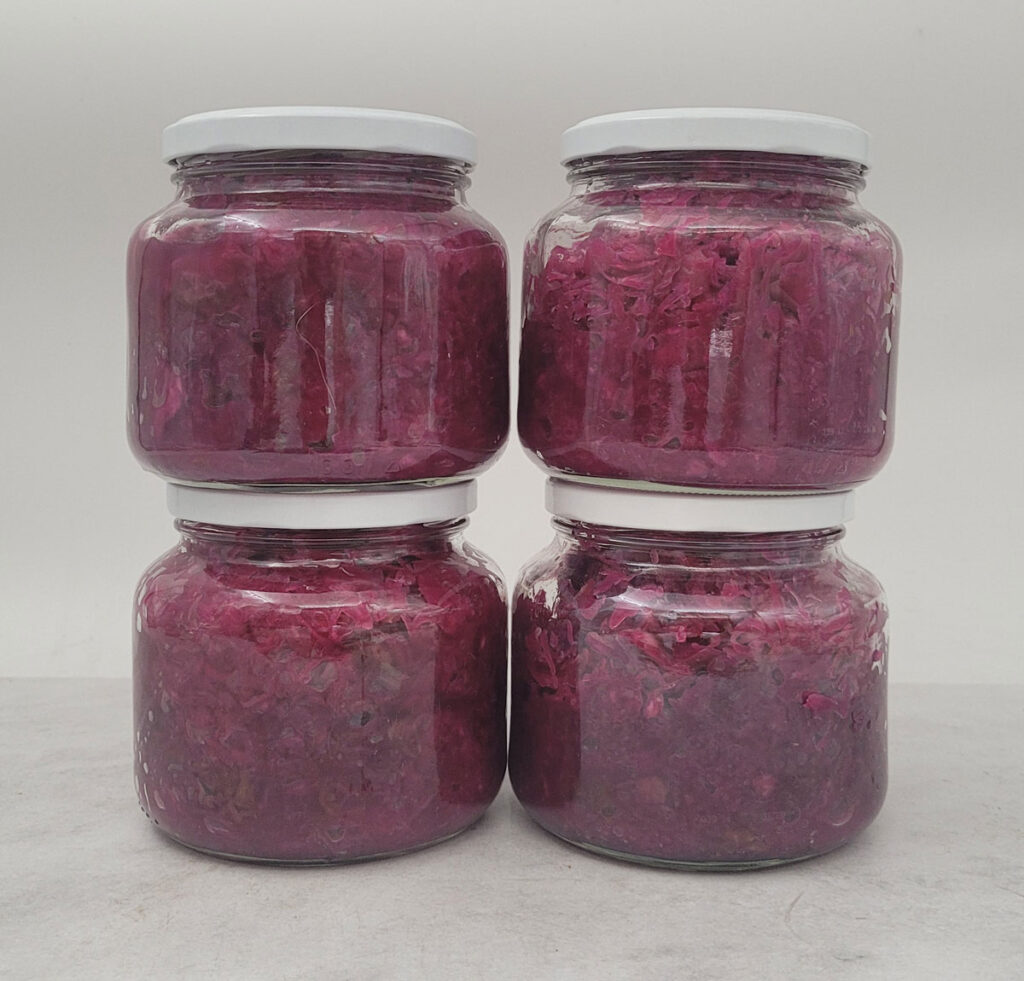
Transferred to fresh bottles🥬💜 Our homemade purple sauerkraut is ready to be stored in the fridge to continue developing its delicious tang. Can’t wait to taste the vibrant flavour we’ve created! #FermentationJourney #PurpleSauerkraut #HealthyLiving”
Homemade Probiotic: DIY Sauerkraut
Equipment
- 1 tamper Or other makeshift solution
- 4 fermentation weights Or clean rocks
- 4 500ml canning jars
- 4 cheesecloth or muslin covers
- 4 elastics
- 1 large chopping board
- 1 large sharp knife
- 1 food processor Optional
- 1 large pot
- 1 large bowl
- 1 tong
Ingredients
- 1.8 Kg green or purple cabbage Preferably organic
- 1 tbsp quality salt (fine texture) Himalayan pink salt, sea salt or Oryx Desert Salt
- filter water If needed
Instructions
- Sterilise your jars, lids and weights in boiling water for 10 minutes. Remove with your tongs and allow to drip and cool upside down.
- 1.8 Kg green or purple cabbage Remove the outer leaves, as they may be damaged or dirty. Aim to have at least 1.7–1.8 kg of cabbage to work with after trimming.
- Save two large, clean leaves to use later for covering the shredded cabbage during fermentation. This will act as a natural "lid" to keep the kraut submerged under its brine.
- Remove the core from the cabbage and discard it. Cut the cabbage into quarters to make it easier to handle.
- Shred the cabbage by hand or with a food processor.
- Transfer to your large bowl.
- Allow the cabbage to sit for 10–15 minutes. This rest time makes the next step easier.
- Evenly sprinkle the salt over the shredded cabbage.
- Use clean hands to gently toss the cabbage, ensuring the salt coats every piece. Then, massage the cabbage for about 10 minutes. As you massage, the cabbage will wilt and reduce in volume, releasing liquid to form a salty brine.
- Scoop the wilted cabbage into the four sterilised jars, dividing it equally.
- Use your tamper (or alternative tool) to firmly pack down the cabbage in each jar. Compressing removes air pockets and ensures the cabbage is fully submerged in brine.
- Divide the brine equally between the jars, ensuring the cabbage is completely covered by liquid. If necessary, press the cabbage again to release more brine or add a small amount of filtered water to top it up.
- Take the large cabbage leaves you set aside earlier and cut them into 4 circles, each approximately the size of the lip of your jar.
- Gently press each cabbage circle into the top of the shredded cabbage in each jar. This will help keep the cabbage submerged under the brine during fermentation.
- Place the fermentation weights (or your chosen alternative, like a clean rock) on top of the cabbage leaves in each jar. The weights should fit snugly inside the jar and keep the cabbage submerged under the brine. This is essential to prevent exposure to air and mold growth.
- If you're using cheesecloth or muslin, cover each jar with the fabric and secure it with an elastic band. This allows the gases produced during fermentation to escape while keeping out dust and debris. (Alternative: If you have fermentation lids with a release valve, you can use them to cover the jars instead).
- Ensure that the brine completely covers the cabbage. If the brine level has dropped, top up with a small amount of filtered water to keep the cabbage submerged.
- With everything packed down and covered, your sauerkraut is ready for fermentation!
- Place the jars in a cool, dark spot at room temperature, away from direct sunlight. A kitchen cupboard or pantry is ideal. The fermentation process will begin, and the cabbage will start to develop its tangy flavour.
- Let the sauerkraut ferment for 1 to 2 weeks. Check it daily to ensure the cabbage stays submerged in the brine. If needed, press it down with the tamper or add more brine (saltwater solution) to keep it covered.
- After a week, start tasting the sauerkraut daily. Once it reaches your desired level of sourness, it’s ready to be moved to the fridge.
- When fermentation is complete, transfer sauerkraut to clean jars, seal them with their lids and transfer them to the fridge. The cold will slow down the fermentation process and preserve the sauerkraut. It will continue to improve in flavour as it sits. (You can use the same canning jar if you prefer).
- Your homemade sauerkraut is now ready to enjoy! It can last in the fridge for several months, so be sure to make plenty to enjoy over time.
Serving Suggestions:
Here are some healthy, clean eating serving suggestions for your sauerkraut:
- With Grilled Meats
Serve as a side dish alongside grilled chicken, or grass-fed beef for a satisfying, protein-packed meal. The tangy flavour of sauerkraut pairs beautifully with savory meats. - In Wraps or Bowls
Add a spoonful of sauerkraut to a wrap or bowl filled with fresh veggies, quinoa, and your choice of protein (salmon, or chicken). It adds a crunchy, probiotic boost. - On Top of Avocado Toast
Top whole grain or gluten-free toast with smashed avocado and a generous helping of sauerkraut for a healthy, gut-friendly breakfast or snack. - With Grain or Legume Salads
Pair with a hearty salad of cooked quinoa, lentils, or chickpeas. The tartness of the sauerkraut balances the earthiness of the grains and legumes. - As a Topping for Fermented Boere Rolls
For a clean-eating twist on a classic, top a fermented, nitrate-free sausage with sauerkraut for extra flavour and probiotics. - As a Side for Baked Sweet Potatoes
Serve sauerkraut alongside baked sweet potatoes for a delicious, fibre-rich meal. You can add a dollop of Greek yogurt or a drizzle of tahini for extra creaminess. - With Roasted Vegetables
Add sauerkraut to roasted vegetables like Brussels sprouts, carrots, and cauliflower for a tangy contrast to the caramelised flavours of the veggies. - In a Detox Smoothie
Blend a small spoonful of sauerkraut into a detoxifying green smoothie with spinach, cucumber, lemon, and ginger for a gut-healing boost.
These ideas will help you incorporate sauerkraut into a variety of clean eating meals while enjoying its nutritional benefits!